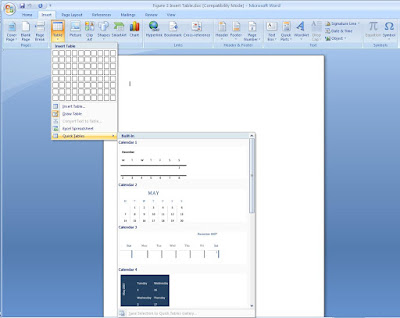
With Table menu you have the option to draw a table or insert a table. Convert your data into table
Drawing a table: Click on the table menu, from the Insert Menu bar, on the drop down menu select on the Draw Table, your cursor will immediately turn into a pen, take the cursor to the location you want to draw your table. Click and hold the mouse as you drag the mouse and release the mouse after dragging, as you drag your mouse you will be able to see the area being covered by your table. With the most still having a pen like cursor, divide the object into both rows and columns and you are now ready to start typing
Insert Table: With Insert Table option, the computer will do the work for you, your main task is to click on the Insert Table, and on the dialogue Box that appears specify the number of rows and columns you want your table to have and then click OK. Your table will be inserted at the location where your cursor is
Excel Spreadsheet: This allows you to insert excel spreadsheet into your word document and work on Microsoft Word as if you are in Microsoft Excel. Click on Insert Table, then on Excel Spreadsheet
Quick Tables: Word 2007 gives the ability to insert quick tables which are already predefined, with most are to do with the Year calendar. The figure above shows the Table menu with Quick table option opened
Our previous lesson on Cover page helps you to get the right outer page for your document

No comments:
Post a Comment